How Can You Remove a Factory Window Tint

How Can You Remove a Factory Window Tint?

Removing the factory tint from your car windows can be quite a task. Tint film is composed of two layers. When pulled, the top layer may come off without too much trouble but leave the second layer behind. The most effective system includes pulling both layers together. If done incorrectly, you may spend hours scraping off the stuck pieces of tint. With the proper steps, you can remove the factory tint yourself and save the money a professional would charge to do the job for you.

Instructions

Windshields

    1

    Remove any obstructions from the window, such as the rear brake light.

    2

    Spray the outside of the window with water and then cover it with plastic. Cut away excess plastic so that the tarp is roughly the shape of the window.

    3

    Lay a tarp across the rear deck and seats. Cover the front dashboard with plastic. Spray the inside of the window with pure ammonia. You may want to wear a face mask. Ammonia is very strong.

    4

    Cover the ammonia-soaked window with plastic and secure the plastic with tape.

    5

    Park the car in a sunny area. Leave the car for one hour.

    6

    Peel the tint off the window. Remove the plastic from the corner of the window. Leave as much the window covered as possible so the ammonia does not evaporate.

    7

    Spray the corner again with ammonia. Use a razor to pull away the corner of the tint. Be careful not to cut through any defroster lines or antennas. Once the corner rises, grab the loose piece with both hands and pull it away from the window. Pull slowly and with consistent pressure; the goal is to pull the film off in one piece. You will pull the plastic off as the tint pulls away from the window. If necessary, spray ammonia as you pull. If the tint film breaks, spray ammonia and use the razor to restart it.

    8

    Scrub off the adhesive residue stuck to the window once the film comes off. Spray the window glass again with ammonia. Use a fine steel wool pad to scrub off the adhesive.

    9

    Spray the window with window cleaner and wipe it down with paper towels or newspaper.

Side Windows

    10

    Spray the window down with warm, soapy water. Let soak for two or three minutes.

    11

    Use a razor blade in a holder and cut an opening in the tint.

    12

    Slide the blade under the tint at the opening you cut. Pull enough of the tint film away so you can grasp it with your hands.

    13

    Pull the film, using both hands, away from the window. Remove the film in segments until the window is clear.

    14

    Spray the window down again with warm, soapy water. Scrape away any adhesive residue. Clean the window with spray cleaner and paper towels.

Read More..

How to Replace Ford 4WD Front Disc Brakes

How to Replace Ford 4WD Front Disc Brakes

In tough economic times, people look for different ways to save money. One of those can be making as many of the necessary repairs to your Ford 4WD yourself. This includes replacing the front disc brakes, which is a task you can do in your driveway or garage. The brakes on the front of your truck will wear much faster than those on the rear. When you start hearing a high-pitched noise coming from the front end when you apply the brakes, youll know its time to service them. However, never depend on that as your sole indicator; you need to inspect them periodically.

Instructions

    1

    Park the truck on a level surface and place the wheel chocks behind the rear wheels. Open the engine compartment and remove 2/3 of the brake fluid from the master cylinder into the drain pan. Jack the truck up with the automobile jack and place a jack stand underneath near the jacking point. Raise the jack stand up to the frame of the truck.

    2

    Remove the wheel using the lug wrench. Remove the brake caliper using a socket and ratchet. The retaining pins are on the back side of the caliper.

    3

    Retract the brake caliper piston back inside the caliper by attaching the C-clamp to the caliper and using the old brake pad as a contact surface. Tighten the C-clamp until the caliper piston seats itself into the caliper.

    4

    Inspect the brake rotor for visible signs of damage. If the rotor has grooves worn into it from bad brake pads, then it will have to be machined smooth or you need to replace it if the damage is too bad.

    5

    Place the new brake pads into the caliper, clipping them in place with the clips attached to the pads. Place the caliper back on the axle and tighten the retaining pins with the socket and ratchet.

    6

    Put the wheel back on the truck and tighten the lug nuts with the lug wrench. Remove the jack stand and lower the truck back to the ground. Repeat the process on the other wheel.

    7

    Once you finish both sides, pump the brakes several times until the brake pedal is firm when you depress it. This allows the brake pads to settle evenly onto the brake rotors. Check the fluid level in the master brake cylinder and replace it as necessary.

Read More..

How to Repair Brake Caliper Slides on the Honda Civic EX

How to Repair Brake Caliper Slides on the Honda Civic EX

The front calipers on the Honda Civic EX are known as sliding calipers. The two bolts holding the calipers in are screwed into pins that are designed to allow the caliper to slide, slightly, back and forth. Over time, these pins can become rusty or just covered in debris, which prevents them from sliding as freely. This lack of movement can cause one brake pad to constantly rub against the rotor and wear out faster. Fortunately, these pins can be removed and reconditioned with relative ease.

Instructions

    1

    Loosen the lug nuts from the Civics front wheels.

    2

    Place the floor jack beneath the Civic and raise the front end.

    3

    Put jack stands beneath the vehicle to secure it.

    4

    Remove the front wheels by removing the lug nuts and pulling the wheel off.

    5

    Look on the rear of the brake caliper and locate the upper and lower bolts, known as caliper bolts.

    6

    Loosen and remove the caliper bolts, using the ratchet and socket. If the pin that the bolts screw into spins, use the open end of a combination wrench to hold, keeping it from turning.

    7

    Pull the caliper from the brake assembly and attach it to a suspension component using a bungee strap.

    8

    Look on the caliper bracket, the metal object that the caliper was bolted to. Locate the two caliper pins, the two objects that the caliper bolts were screwed into.

    9

    Remove the caliper pins by grabbing them with the channel-lock pliers and pulling them outward. A light twisting motion may help. Notice the rubber boots will remain attached to the caliper bracket, pull these rubber boots from the bracket.

    10

    Insert the metal pipe cleaner into the holes in the caliper bracket where the caliper pins were inserted. Clean the entire bore of these holes with an in-and-out motion of the metal pipe cleaner.

    11

    Place the rubber boots back on the caliper bracket until they properly sit on the grooves provided.

    12

    Remove any rust or debris from the caliper pins, using the wire brush. Never use sandpaper, as this creates a rough surface and limits the pins ability to slide.

    13

    Spray the pins with the brake parts cleaner and wipe them with a shop rag.

    14

    Repeat steps 10 and 11 until the pins are completely clean and smooth.

    15

    Apply a generous coat of an anti-seize chemical to the length of both pins and reinsert them into the caliper bracket. Make certain the rubber boots sit in the grooves on the pins.

    16

    Remove the caliper from the bungee strap and place it over the brake pads.

    17

    Hand-tighten the upper and lower caliper bolts.

    18

    Hold the caliper pins with the open end of a combination wrench, and tighten the caliper bolts, using a ratchet and socket.

    19

    Repeat steps 5 through 18 for any other caliper pins needing repair.

    20

    Place the wheels back on the Civic and hand-tighten the lugs.

    21

    Remove the jack stands from under the vehicle, and slowly lower it to the ground.

    22

    Tighten the lugs to 80 foot-pounds, using the torque wrench and a socket.

    23

    Press and release the brake pedal to ensure the brakes are working properly.

Read More..

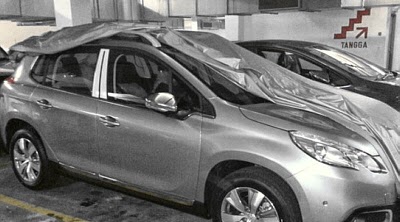
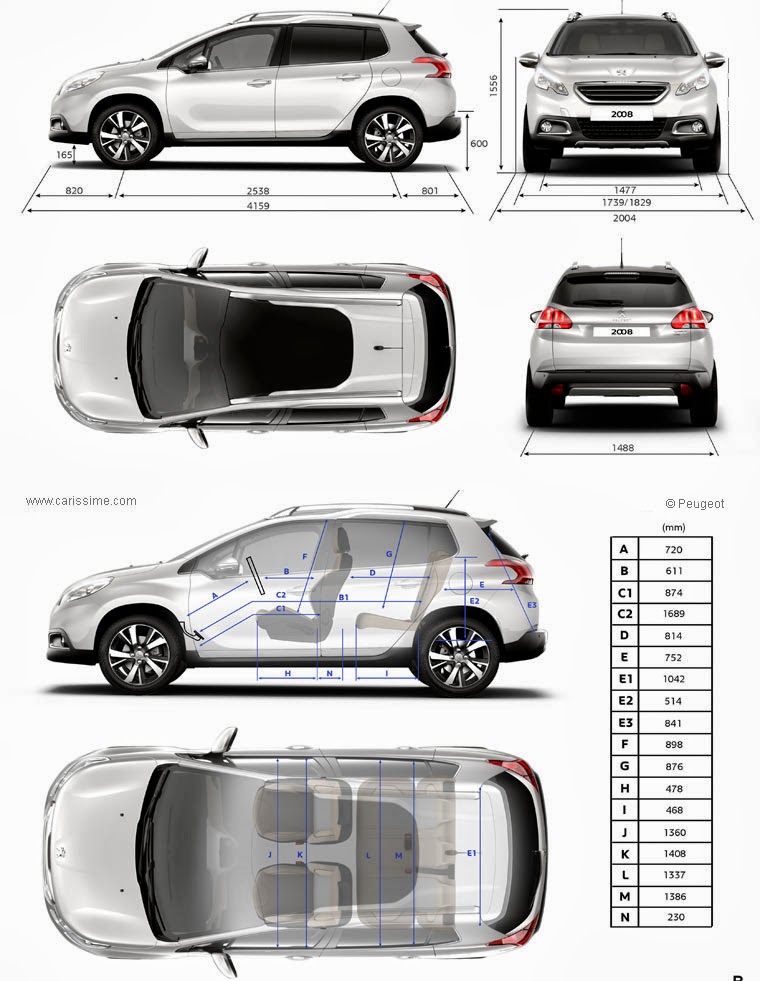
Peugeot 2008 to be launched in Malaysia soon


Read More..

From 0 to 100 Sprint

In kph or mph?
whichever...

A stretch of "Persiaran Timor" to the south of Putrajaya runs in parallel with Sungai Langat is just perfect for the sprint test up to and beyond 160kph. It is a six-lane dual carriageway. There is a 2-km flat and straight part of the road, virtually no traffic at dusk. I was on my way back from Cyberjaya then. [Putrajaya Hospital is also not very far away... just in case]
A GPS-datalogger and MapSource were used for the data recording and processing respectively. The same set of equipment was also used for testing myPeugeot 206 before.

"0 to 100kph" or "0 to 100mph" sprints... in less than 9sec and 25sec respectively. The "Century acceleration" on tiptronic* is about 400ms faster than the time recorded during previous test on AUTO.

*The advantage of TIPTRONIC is that the accelerator pedal need not be depressed while up-shifting, hence faster acceleration and smoother speed curve. However as can be seen from the "speed vs time" chart there are slight dips and surge during upshift at the end of 1st gear @050kph, 2nd gear @100kph and 3rd gear @160kph during which the torque dropped below 180Nm. After shifting up there was a soft jerk as the torque surged above 210Nm when the rpm dropped to app. 4000rpm.

A similar test [by others] using a different device also recorded 8.9sec for the 0~100kph sprint.

Will do the same test after the 10,000th km Service.


Frequently Visited Pages:
| Home | Fuel Consumption | Performance | uncles DIY |
Car Size Comparison | Motoring Myths | RON95 |
Read More..

How to Replace Drum Brake Shoes

How to Replace Drum Brake Shoes

Virtually all vehicles manufactured up to the mid-1970s used drum brakes on all four wheels. However, most modern vehicles use disc brakes on the front of the vehicle and drum brakes on the rear only. Drum brakes operate when the internal brake shoes press out against a drum that rotates with the wheel. The brake shoes on your drum brakes will eventually wear out and will need to be replaced.

Instructions

    1

    Raise the rear of the vehicle with a hydraulic jack. Place jack stands under each side of the rear axle. Lower the hydraulic jack so that the rear of the vehicle is supported by the jack stands.

    2

    Remove the lug nuts from the rear wheels with a lug wrench turned in a counterclockwise direction. Remove the rear wheels from the vehicle and set them aside. Slide the brake drums off of the rear wheel hubs and set them aside.

    3

    Work on one side of the vehicle at a time. Locate both brake shoes on the right and left side of the wheel hub. Locate the brake shoe return spring which connects the two brake shoes at the top of the wheel hub. Remove the brake shoe return spring by placing a pair of brake spring pliers over the end of the spring. Pull on the pliers to stretch the spring until it can be unhooked from the brake shoes. Remove the spring and set it aside.

    4

    Place a brake shoe removal tool over the circular brake shoe retainer clip, located at the center of each brake shoe. Push down on the tool and rotate it counterclockwise. Remove the tool, the retainer clip, and the spring behind the clip and set them aside. Repeat this step for both brake shoes.

    5

    Pull the brake shoes from the wheel hub and discard them. Place new brake shoes into the same position as the old shoes, making sure the pin the retainer clip attaches to protrudes through the mounting hole at the center of the brake shoes. Place the spring and retainer clip over the pin and place the brake shoe removal tool over the clip. Push down on the tool and rotate it clockwise until the clip locks into place.

    6

    Position the hook on one end of the return spring into the hole at the top of one of the brake shoes. Use the brake spring pliers to stretch the spring until the hook in the other end of the spring is positioned into the hole at the top of the other brake shoe. Slide the brake drum back over the hub.

    7

    Repeat the above steps for the other rear wheel. Replace the wheels and tighten the lug nuts with a lug wrench in a clockwise direction. Raise the rear of the vehicle with a hydraulic jack and remove the jack stands from under the vehicle. Lower the vehicle and remove the hydraulic jack.

Read More..

0 100km hr on RON95 Part 2 in S Auto Mode

[Note: Somebody had recorded and published "more than 10 seconds" for the century acceleration without knowing that he and the ECU were actually on the learning mode]

AL4 gearbox is auto adaptive. The gearbox ECU must be told and taught for the desired driving style. Once the ECU has adapted to the requirement sure it can deliver...

Yesterday, there were some other cars on my favourite stretch for the sprint because I was a little bit late to workplace . The sprint test was aborted.

Today I left home a bit earlier. So I could do another sprint test freely at the same straight I did two days ago. Todays test was in S mode. Here is the logged data:

[click on the images to enlarge]
...and the familiar look chart.
See, even on RON95 the 308 performs similar to manufactures claim: "9.3 second for the 0~100km/hr acceleration". So, what does that mean? RON95 no good??


Frequently Visited Pages:
| Home | Fuel Consumption | Performance | uncles DIY |
Car Size Comparison | Motoring Myths | RON95 |
Read More..
Diberdayakan oleh Blogger.