Anti Virus Karpersky to Mobile Phone

Bagi pengguna Mobile phone yang menggunakan sistem operasi Symbian (9.1 keatas) atau Windows Mobile (5.0 keatas), selama piala dunia 2010 ini berlangsung, bisa mendapatkan gratis Kaspersky Mobile Security 9 dengan kode serialnya. Tidak hanya mengamankan dari serangan virus/jaringan, tetapi juga proteksi privasi, menjaga akses file, dan berbagai fitur keamanan lainnya.

Sebagai software atau aplikasi keamanan untuk mobile phone (smart phone), Kaspersky Mobile Security 9 mempunyai fitur-fitur antara lain :
  • Privacy Protection, untuk mengontrol privasi nomor atau contact yang ada di mobile phone. Menampilkan atau menyembunyikan entri phonebook, sms dan daftar panggilan (logs)
  • Menemukan lokasi smartphone ketika dicuri/hilang, dengan menggunakan fitur GPS Find and function, smartphone yang dicuri bisa diketahui lokasinya.
  • Mengamankan contact, foto dan file dari akses yang tidak di inginkan. Data bisa di enkripsi dan di blok atau dihapus ketika smartphone hilang/dicuri
  • Blok SMS atau panggilan yang tidak di inginkan
  • Parental Control, orang tua dapat mencegah/blok sms atau panggilan tertentu dan juga melacak keberadaannya dengan GPS Find
  • Proteksi dari malware (virus) dan serangan jaringan
Fitur-fitur diatas memang menarik, salah satunya ketika mobile phone di curi orang, maka hanya dengan mengirimkan sms tertentu, mobile phone kita akan otomatis terkunci dan isiya tidak akan dapat diakses, bahkan bisa otoamtis memerintahkan untuk menghapus data-datanya. Termasuk fitur GPS Find yang bisa menampilkan posisi dimana mobile phone tersebut.

Fitur lainnya adalah SIM watch, yaitu misalnya ketika pencuri mengganti SIM card mobile phone, maka SIM Watch akan otomatis mem-blok HP dan mengirinkan email ke pemiliknya nomor baru yang dimasukkan.

Tetapi sekali lagi bahwa Kaspersky Mobile Security 9 memang tidak bisa dijalankan di semua HP, hanya mobile phone (smartphone) yang menggunakan Sistem operasi Symbian 9.1, 9.2, 9.3, 9.4 Series 60 (Nokia smartphones) atau Microsoft Windows Mobile 5.0, 6.0, 6.1, 6.5. Jika ingin mengeceknya, silahkan melihat Mobile Downloads

Download dan Installasi
Jika sistem operasi mobile phone anda mendukung software ini, untuk melakukan intallasi bisa menggunakan salah satu cara berikut :
  • Scan QR Code berikut menggunakan mobile phone untuk download Kaspersky Mobile Security 9
  • Buka alamat website kms.kaspersky.com melalui smartphone
  • Download aplikasi melalui PC/komputer melalui link http://www.kaspersky.com/mobile_downloads

Setelah aplikasi di download dan di install, gunakan kode registrasi ini untuk mengaktifkan BFK48-UJ3TR-AFKN3-RP5PU ( Kaspersky world cup )
Read More..

How To Download And Install Hl Booster In Counter Strike


Download  here The hl booster.rar , unzipp the file (directly in addons or copy the booster folder in HLDScstrikeaddons, (HLDS is the directory where you have the server), then edit in HLDScstrikeaddonsmetamodplugins.ini,the
line:win32 addonshlboosterdlls ooster_mm.dll. Very important!!!! In order to work, in the HLDScstrikeserver.cfg you have to write the next line:

exec addons/hlbooster/hlbooster.cfg


Please UnCheck The Tick/Mark

Read More..

Who wants to be a millionaire


Jar game enough to increase public knowledge, this is a jar game who wants to be a millionaire. Jar game arcade with a variety of questions that should be in charge if you want to win the game, java download 176x220   free dam will probably give you a general knowledge.

Filetype: Who wants to be a millionaire. zip
Filesize: 95.5 kb
Requirment: j2me or midp2, java, jar

Download here:

176x220
Read More..

Simple Ways To Get High Traffic

There are some simple ways to get high traffic.
First Create unique titles. Optimization makes the head that contain the keyword in the search engines. And above all, make the game interesting as possible, invite the curiosity of potential readers. For example, to be number one on Google forever.
Second With the meta tag ’description’. Using the meta description tag searches Google or other search engines a summary of an article. Use a unique description for each item.
Third Use the URL structure is not practical. URL structure is easily searchable by the Google search engine is the name of the URL as short as possible (practice). Besides the short URL will be easy to remember (easier) for people who want to link to your blog.
4th Promote your blog. Promote your new blog is slowly and steadily. Promoting a blog effectively stimulate the discovery of your blog faster for those who have the same content of the blog. Such as the promotion of new products in the classified ad sites, without a list.
5th Optimizing the use of images (photos). The pictures of the blog is part of the blog, because the existence of an image will look on the blog every article of living. They are also doing well, plus advice and tips for SEO blogs and websites such as the use of a URL or a search engine friendly permalinks, use the right keywords, re-use, hiking blog, and so on. So .. the nucleus of a real quick way is to bring visitors to your blog or website to speed, to promote and optimize with your blog, so that visitors quickly.

fastcomputertools.com
Read More..

Download Pc Game Drive To Hell FULL VERSION


Description: 

Drive to Hell is an action-packed shooter where youll take a ride through an army of monsters to exact revenge on the Demon King for destroying your favorite dive bar. Enemies assault from all sides, each with its own special personality and attack style. To take them down, youll have access to many weapons and items as well as gunner upgrades, new vehicles, and more! Drive to Hell can be played solo or co-op with up to 4 players. 

SOURCE: Wikipedia.org 

Minimum System Requirements 

Operating system: Windows XP / Windows Vista / Windows 7 / Windows 8 
Processor: Pentium IV 2 ghz
Memory: 1GB 
Sound device: compatible with DirectX 
Hard disk space: 1 GB 


Download Link (43 Mb) 
Download Drive To Hell (FULL VERSION) 
Read More..

How to Replace Ford 4WD Front Disc Brakes

How to Replace Ford 4WD Front Disc Brakes

In tough economic times, people look for different ways to save money. One of those can be making as many of the necessary repairs to your Ford 4WD yourself. This includes replacing the front disc brakes, which is a task you can do in your driveway or garage. The brakes on the front of your truck will wear much faster than those on the rear. When you start hearing a high-pitched noise coming from the front end when you apply the brakes, youll know its time to service them. However, never depend on that as your sole indicator; you need to inspect them periodically.

Instructions

    1

    Park the truck on a level surface and place the wheel chocks behind the rear wheels. Open the engine compartment and remove 2/3 of the brake fluid from the master cylinder into the drain pan. Jack the truck up with the automobile jack and place a jack stand underneath near the jacking point. Raise the jack stand up to the frame of the truck.

    2

    Remove the wheel using the lug wrench. Remove the brake caliper using a socket and ratchet. The retaining pins are on the back side of the caliper.

    3

    Retract the brake caliper piston back inside the caliper by attaching the C-clamp to the caliper and using the old brake pad as a contact surface. Tighten the C-clamp until the caliper piston seats itself into the caliper.

    4

    Inspect the brake rotor for visible signs of damage. If the rotor has grooves worn into it from bad brake pads, then it will have to be machined smooth or you need to replace it if the damage is too bad.

    5

    Place the new brake pads into the caliper, clipping them in place with the clips attached to the pads. Place the caliper back on the axle and tighten the retaining pins with the socket and ratchet.

    6

    Put the wheel back on the truck and tighten the lug nuts with the lug wrench. Remove the jack stand and lower the truck back to the ground. Repeat the process on the other wheel.

    7

    Once you finish both sides, pump the brakes several times until the brake pedal is firm when you depress it. This allows the brake pads to settle evenly onto the brake rotors. Check the fluid level in the master brake cylinder and replace it as necessary.

Read More..

How to Repair Brake Caliper Slides on the Honda Civic EX

How to Repair Brake Caliper Slides on the Honda Civic EX

The front calipers on the Honda Civic EX are known as sliding calipers. The two bolts holding the calipers in are screwed into pins that are designed to allow the caliper to slide, slightly, back and forth. Over time, these pins can become rusty or just covered in debris, which prevents them from sliding as freely. This lack of movement can cause one brake pad to constantly rub against the rotor and wear out faster. Fortunately, these pins can be removed and reconditioned with relative ease.

Instructions

    1

    Loosen the lug nuts from the Civics front wheels.

    2

    Place the floor jack beneath the Civic and raise the front end.

    3

    Put jack stands beneath the vehicle to secure it.

    4

    Remove the front wheels by removing the lug nuts and pulling the wheel off.

    5

    Look on the rear of the brake caliper and locate the upper and lower bolts, known as caliper bolts.

    6

    Loosen and remove the caliper bolts, using the ratchet and socket. If the pin that the bolts screw into spins, use the open end of a combination wrench to hold, keeping it from turning.

    7

    Pull the caliper from the brake assembly and attach it to a suspension component using a bungee strap.

    8

    Look on the caliper bracket, the metal object that the caliper was bolted to. Locate the two caliper pins, the two objects that the caliper bolts were screwed into.

    9

    Remove the caliper pins by grabbing them with the channel-lock pliers and pulling them outward. A light twisting motion may help. Notice the rubber boots will remain attached to the caliper bracket, pull these rubber boots from the bracket.

    10

    Insert the metal pipe cleaner into the holes in the caliper bracket where the caliper pins were inserted. Clean the entire bore of these holes with an in-and-out motion of the metal pipe cleaner.

    11

    Place the rubber boots back on the caliper bracket until they properly sit on the grooves provided.

    12

    Remove any rust or debris from the caliper pins, using the wire brush. Never use sandpaper, as this creates a rough surface and limits the pins ability to slide.

    13

    Spray the pins with the brake parts cleaner and wipe them with a shop rag.

    14

    Repeat steps 10 and 11 until the pins are completely clean and smooth.

    15

    Apply a generous coat of an anti-seize chemical to the length of both pins and reinsert them into the caliper bracket. Make certain the rubber boots sit in the grooves on the pins.

    16

    Remove the caliper from the bungee strap and place it over the brake pads.

    17

    Hand-tighten the upper and lower caliper bolts.

    18

    Hold the caliper pins with the open end of a combination wrench, and tighten the caliper bolts, using a ratchet and socket.

    19

    Repeat steps 5 through 18 for any other caliper pins needing repair.

    20

    Place the wheels back on the Civic and hand-tighten the lugs.

    21

    Remove the jack stands from under the vehicle, and slowly lower it to the ground.

    22

    Tighten the lugs to 80 foot-pounds, using the torque wrench and a socket.

    23

    Press and release the brake pedal to ensure the brakes are working properly.

Read More..

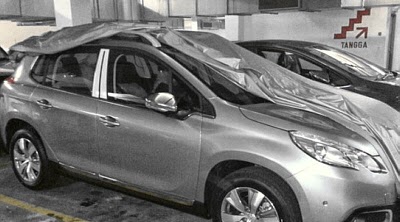
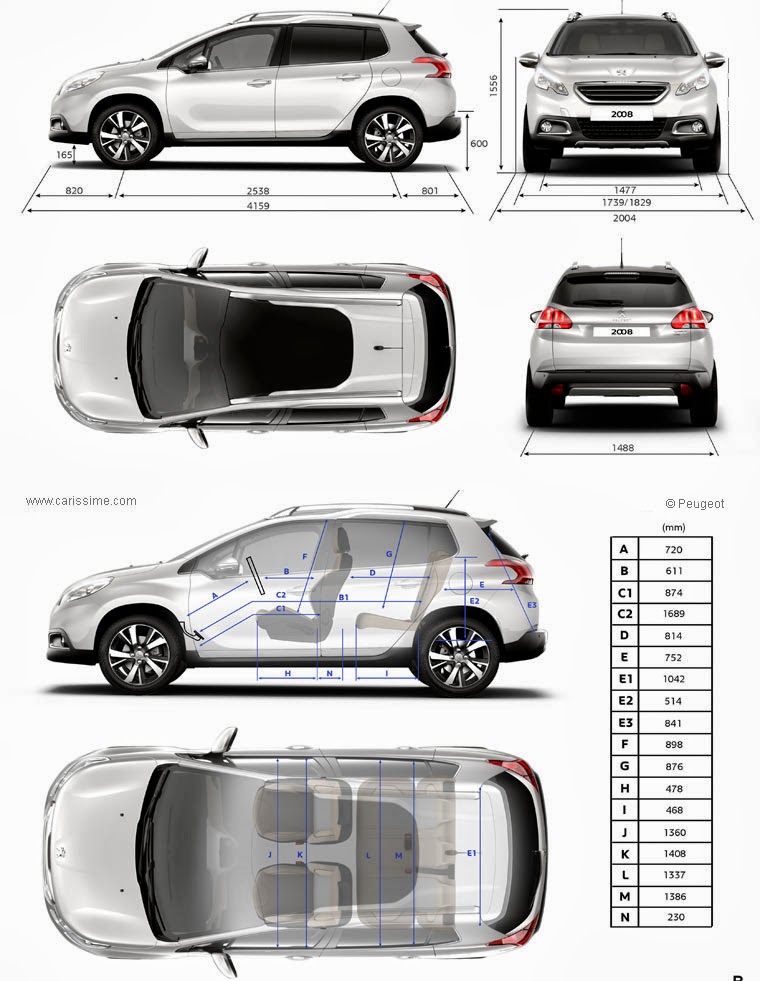
Peugeot 2008 to be launched in Malaysia soon


Read More..

From 0 to 100 Sprint

In kph or mph?
whichever...

A stretch of "Persiaran Timor" to the south of Putrajaya runs in parallel with Sungai Langat is just perfect for the sprint test up to and beyond 160kph. It is a six-lane dual carriageway. There is a 2-km flat and straight part of the road, virtually no traffic at dusk. I was on my way back from Cyberjaya then. [Putrajaya Hospital is also not very far away... just in case]
A GPS-datalogger and MapSource were used for the data recording and processing respectively. The same set of equipment was also used for testing myPeugeot 206 before.

"0 to 100kph" or "0 to 100mph" sprints... in less than 9sec and 25sec respectively. The "Century acceleration" on tiptronic* is about 400ms faster than the time recorded during previous test on AUTO.

*The advantage of TIPTRONIC is that the accelerator pedal need not be depressed while up-shifting, hence faster acceleration and smoother speed curve. However as can be seen from the "speed vs time" chart there are slight dips and surge during upshift at the end of 1st gear @050kph, 2nd gear @100kph and 3rd gear @160kph during which the torque dropped below 180Nm. After shifting up there was a soft jerk as the torque surged above 210Nm when the rpm dropped to app. 4000rpm.

A similar test [by others] using a different device also recorded 8.9sec for the 0~100kph sprint.

Will do the same test after the 10,000th km Service.


Frequently Visited Pages:
| Home | Fuel Consumption | Performance | uncles DIY |
Car Size Comparison | Motoring Myths | RON95 |
Read More..

How to Replace Drum Brake Shoes

How to Replace Drum Brake Shoes

Virtually all vehicles manufactured up to the mid-1970s used drum brakes on all four wheels. However, most modern vehicles use disc brakes on the front of the vehicle and drum brakes on the rear only. Drum brakes operate when the internal brake shoes press out against a drum that rotates with the wheel. The brake shoes on your drum brakes will eventually wear out and will need to be replaced.

Instructions

    1

    Raise the rear of the vehicle with a hydraulic jack. Place jack stands under each side of the rear axle. Lower the hydraulic jack so that the rear of the vehicle is supported by the jack stands.

    2

    Remove the lug nuts from the rear wheels with a lug wrench turned in a counterclockwise direction. Remove the rear wheels from the vehicle and set them aside. Slide the brake drums off of the rear wheel hubs and set them aside.

    3

    Work on one side of the vehicle at a time. Locate both brake shoes on the right and left side of the wheel hub. Locate the brake shoe return spring which connects the two brake shoes at the top of the wheel hub. Remove the brake shoe return spring by placing a pair of brake spring pliers over the end of the spring. Pull on the pliers to stretch the spring until it can be unhooked from the brake shoes. Remove the spring and set it aside.

    4

    Place a brake shoe removal tool over the circular brake shoe retainer clip, located at the center of each brake shoe. Push down on the tool and rotate it counterclockwise. Remove the tool, the retainer clip, and the spring behind the clip and set them aside. Repeat this step for both brake shoes.

    5

    Pull the brake shoes from the wheel hub and discard them. Place new brake shoes into the same position as the old shoes, making sure the pin the retainer clip attaches to protrudes through the mounting hole at the center of the brake shoes. Place the spring and retainer clip over the pin and place the brake shoe removal tool over the clip. Push down on the tool and rotate it clockwise until the clip locks into place.

    6

    Position the hook on one end of the return spring into the hole at the top of one of the brake shoes. Use the brake spring pliers to stretch the spring until the hook in the other end of the spring is positioned into the hole at the top of the other brake shoe. Slide the brake drum back over the hub.

    7

    Repeat the above steps for the other rear wheel. Replace the wheels and tighten the lug nuts with a lug wrench in a clockwise direction. Raise the rear of the vehicle with a hydraulic jack and remove the jack stands from under the vehicle. Lower the vehicle and remove the hydraulic jack.

Read More..

How to Replace the Rotor in a Toyota Tundra

The Toyota Tundra utilizes brake discs, also known as rotors, in combination with a caliper and brake pad assembly to bring your vehicle to a stop. If the rotors get warped or worn down, it can cause your Tundra to shudder and pulse when you hit the brakes. Its fairly easy to swap the rotors yourself and keep some extra money in your pocket.

Instructions

    1

    Jack up your Toyota Tundra. Block the wheels that you arent working on to keep your Tundra from rolling while you work. Disconnect the negative battery cable. Remove the first tire and wheel assembly.

    2

    Remove the brake hose from the caliper and then quickly plug the end of the hose to prevent spillage. Next, remove the two caliper mounting bolts. This allows you to then pull the caliper assembly off of the old rotor.

    3

    Clean the area around the hub with a damp cloth to remove any dirt or corrosion. Install the new rotor onto the hub.

    4

    Lubricate the caliper slides and bolts with lithium grease and then install the caliper and tighten the bolts. Torque the caliper bolts to 90 ft. lbs. (123 Nm).

    5

    Reconnect the brake hose to the caliper and torque to 11 ft. lbs. (15 Nm). Refill the brake fluid and then bleed the brakes. Install the wheel assembly and tire.

    6

    Repeat this process for each additional rotor. When youre finished, lower your vehicle, double check the brake fluid level and reconnect the negative battery cable.

    7

    Pump the brakes until you get a firm pedal and then be sure to road test your Toyota Tundra to make sure that the installation was successful.

Read More..

How to Repair Windshield Dings

How to Repair Windshield Dings

At some point, most people have had a ding in the windshield of their car. Whether from a rock, hail or other debris, a windshield ding needs to be repaired so that it does not expand into a larger hole. Windshield repair work can be quite expensive if a professional is hired, and many insurance companies do not cover windshield repair. The good news is that you can fix a windshield ding yourself without spending a lot of money. There are a variety of types of windshield repair kits on the market. One of the most-common types uses a syringe and adhesive.

Instructions

    1

    Purchase a windshield repair kit to fix the windshield ding. You can purchase these kits at most auto parts and supply stores.

    2

    Clean the windshield thoroughly with glass cleaner and paper towels to remove any dirt and debris. Dry the windshield. The windshield should also be around room temperature or higher. The car may need to sit inside of a garage to get the windshield to an acceptable temperature.

    3

    Remove the adhesive strip from the windshield repair kit. Peel off the film backing on one side of the adhesive. The adhesive is already pre-cut.

    4

    Center the pre-cut adhesive over the ding in the windshield. Use your thumbnail or small blunt object to rub over the adhesive several times. Peel off the top film.

    5

    Adjust the enclosed plastic adapter so that the fitting is as upright as possible and stick it to the film. Rub the adhesive again with a blunt object or your fingernail.

    6

    Remove the cap from the enclosed syringe, holding it with the pointed end. Fasten the syringe to the plastic adapter.

    7

    Hold the body of the syringe with one hand so that it is stable. Extend the syringe handle as far as it will allow by pulling it up. Keep the handle in this position for one minute. The adhesive will make its way down through the ding and into the glass.

    8

    Push the syringe handle back down quickly after one full minute has expired. The pressure from releasing it quickly will force the adhesive down into the crack. Repeat this about six times, pulling the syringe handle up and slamming it down quickly.

    9

    Take away the syringe, as well as the adapter and adhesive sheet. You will notice a film on the glass from the adhesive. Dampen a paper towel with rubbing alcohol to remove the adhesive only from around the ding. Avoid putting alcohol onto the ding itself. Shave off any protruding adhesive from the ding with a razor blade.

Read More..

How to Change the Front Disc Pads on a 2001 Ford Expedition

The 2001 Ford Expedition came equipped with a four-wheel-disc brake system and four-wheel ABS. Inspecting the overall condition of the brake system regularly will allow you to identify worn brake-system components before they become a safety concern. Replacing the disc brake pads yourself, when they become worn, is a good way to keep your vehicle repair costs down while maintaining the safety of your Expedition. This repair can be completed in about an hour using basic hand tools.

Instructions

    1

    Apply the parking brake. Place wheel chocks behind the rear wheels. Loosen the lug nuts on the front wheels slightly using the lug wrench. Raise and support the front wheels using the floor jack and jack stands. Remove the front wheels.

    2

    Place a drain pan under the brake assembly. Clean the front brakes, with brake-parts cleaner, to remove the accumulated brake dust. Avoid breathing the dust from the brake system and vapors from the parts cleaner.

    3

    Remove the two 13 mm caliper-mounting bolts that attach the caliper to the caliper bracket on the brake system of the Expedition. Lift the caliper off the caliper bracket and brake pads.

    4

    Apply a thin coat of anti-squeal compound to the back of the brake pads. Allow the compound to dry while you prepare the caliper bracket for installation.

    5

    Slide the pads, one at a time, out of the caliper bracket. Apply a dab of silicon brake grease to the contact points on the anti-rattle clips attached to the caliper bracket. Slide the new pads into place on the caliper bracket.

    6

    Open the bleeder screw on top of the caliper. Slip an old brake pad onto the caliper pistons and use the C-clamps to push the caliper pistons into the caliper housing. Use one C-clamp over each piston, two clamps in total, to push the pistons evenly into the caliper. Close the bleeder screw while the C-clamps hold pressure on the pistons. Remove the C-clamps and clean the caliper with brake-parts cleaner to remove the brake fluid that has spilled out.

    7

    Slip the caliper over the brake pads onto the caliper bracket. Bolt the caliper to the bracket. Install the wheel and lower the Expedition to the ground. Pump the brake pedal several times to expand the caliper before driving the SUV.

Read More..

4age silvertop wiring and conversion to MAP

For those people who want to the AFM sensor and to use MAP sensor but want to retain original wiring, you may refer to this diagram. I have labeled all the input and output at the ecu.

This is ecu diagram from 4age20v silvertop


And this is comparison between blacktop and silvertop ecu pinout. You might re-pin or made a converter to use a blacktop ecu into silvertop wiring.

Read More..

How to change break pads 2

How to change break pads 2 Tube. Duration : 9.97 Mins.


How to change break pads


Tags: disc, breaks, pads, rotors, car, yt:crop=16:9
Read More..

How to Get Rid of a Crack on a Windshield

How to Get Rid of a Crack on a Windshield

Dealing with cracks and chips to your car windshield is crucial to ensure the safety of yourself and others traveling in your car. Cracks are often caused by rocks, pebbles and other debris on the road bouncing off the windshield. In most cases the damage is insignificant, but repair must be carried out as soon as possible to stop the crack weakening the entire structural system of the windshield, which can lead to more serious damage.

Instructions

    1

    Leave the crack alone until you have the time and the necessary tools to attempt a repair. Modern car windows normally have a laminated plastic coating, which means that while parts of the windshield may shatter or suffer damage, underlying glass layers wont explode just because of a small crack or chip. There is enough strength in the windshield for it to stay intact long enough for you to take the car to a garage or auto repair shop.

    2

    Apply clear adhesive tape to the crack if it is more substantial; keep a roll in your glove compartment for quick and easy access. Use a wide roll so that any tiny, loose glass fragments are kept intact and to provide adequate preservation of the glass layers and laminate coating. Dont go overboard with the tape though, as you dont want it to restrict your view when driving.

    3

    Park your car on a level surface when you are ready to repair the crack.

    4

    Clean the windshield with soapy water, ensuring you remove all debris from the crack using the motorized rotary tool in your repair kit. You can use the tool to widen the crack slightly as this will make it easier to apply the resin.

    5

    Attach the repair stickers to the inside of the cracked windshield. Applied correctly, the sticker should cover as large a section of the cracked windshield as possible.

    6

    Inject the resin into the crack using the pump or syringe included in the repair kit. Avoid air bubbles by maintaining an even flow of resin. The resin must make contact with the inside surfaces of the windshield.

    7

    Attach the remaining stickers over the resin and leave it to cure for a minimum of four hours to give it time to set into the windshield. When you remove the stickers inspect the spot closely to make sure the resin has completely cured.

    8

    Take your car to a qualified professional if you dont feel confident getting rid of the crack yourself. In severe cases, if the windshield shatters, the entire glass pane will have to be replaced.

Read More..

Money Saving Tips to Lower Your Driving Costs

In hard economic times we need to make every dollar stretch as far as we can but sometimes, to save money, you have to spend a little money. This is especially true where your car is concerned. Simple low cost maintenance procedures and driving habits can save you a lot more money over the long run.

An unknown author came up with the acronym B-L-O-W-B-A-G that makes it simple to remember how to take care of the most important features on your car.

B = Brakes - Worn brake pads can damage the brake rotors leading to more expensive repairs later on.

L = Lights - It is easy and cheap to change your own light bulbs and good lights can prevent a collision by making your car more visible. Keep extra bulbs in your glove compartment just in case.

O = Oil - Oil changes are cheap and, when done on schedule, will extend the life of your engine. Make sure you use the manufacturers recommended oil type. Check your oil level often and keep an extra bottle handy just in case.

W = Water - Check your water level and make sure you use the recommended coolant for your engine. Check your radiator for leaks and make sure your windshield washer reservoir is full.

B = Battery - Check for corrosion on your battery terminals and, if your battery is not sealed, check the water level and replace it with distilled water when necessary.

A= Air - Check your tire pressure when the tires are cold. Maintaining proper air pressure will prevent wear on your tires and extend your gas mileage.

G = Gas - Make sure your gas gauge is showing the proper level and use the proper octane level recommended by the vehicle manufacturer.

Other money saving tips to remember include:

Tires - Rotate the tires every time you get your oil changed. Rotating your tires will prevent excessive wear and extend the life of your tires. Check the tread; worn tires can cause you to skid on wet roads or they can blow out and possibly cause a collision.

Suspension System - Making sure the springs and connections are in good working order will help extend the life of the vehicle and prevent more expensive repairs later on.

Reduce your insurance rates by attending a defensive driving course or traffic school - In some states, voluntarily attending a defensive driving course can help you reduce your insurance rates. It can also help you improve your driving habits and thus prevent more wear and tear on your vehicle. Check your state laws to see if you are eligible.

Drive the speed limit - Speeding, just by a little bit, wont save you much time and it can cost you money. For example; a ten mile trip at the posted speed of 40 mph will take 15 minutes. Driving 5 mph over the speed limit will only save you a little over a minute but it will cost more gas, create more wear and tear on the engine, and possibly lead to an expensive speeding ticket.

Read More..

How to Remove a Windscreen Chip

How to Remove a Windscreen Chip

Getting a chip in your windscreen can do more than just look ugly. A chip can very quickly develop into a large crack, allowing moisture into the layers of the windscreen, which would then have to be replaced. However, so long as the chip is smaller than a quarter, it is possible to repair the damage yourself. Windscreen (or windshield) repair kits are available in the automotive section of most major retailers.

Instructions

    1

    Dry the windscreen completely. If it is raining or snowing, move the car into a garage to allow it to dry. You can use a hair dryer to hasten the process, but you must make sure there is no moisture inside the chip. If there is, it will get sealed in and cause the windscreen to fog.

    2

    Clean the damaged area with acetone and a paper towel. Acetone will evaporate quickly, but dont use so much that it soaks into the chip.

    3

    Peel the backing film off the repair kits adhesive strip and press the strip onto the windscreen, centered over the chip. Rub it with your fingernail to make sure it has a very strong bond. Once it is secure, peel off the front piece of film, leaving only the adhesive strip.

    4

    Stick the plastic adapter onto the adhesive strip, centered over the chip. Make sure it is secured by rubbing it with your fingernail.

    5

    Turn the syringe of adhesive up (with the plunger pointed at the floor) and remove the cap. Pull the plunger back slightly to prevent material from spilling out of the tip.

    6

    Attach the tip of the syringe to the plastic adapter.

    7

    Pull the plunger all the way back with the syringe attached to the adapter. This will create a vacuum, pulling all air out of the chip. Hold the plunger this way for a full minute, allowing the air from the chip to bubble up through the adhesive. The adhesive will settle down at the tip of the plunger.

    8

    Let go of the plunger handle once all of the air has bubbled through the adhesive. The vacuum will force adhesive into the chip.

    9

    Repeat the pullback and release action four or five times to fully impregnate the chip with adhesive.

    10

    Remove the syringe, plastic adapter and adhesive strip from the windscreen.

    11

    Wipe off excess adhesive from the windscreen with acetone on a paper towel, but be sure to leave a bump over the chip.

    12

    Allow the adhesive to cure for several hours.

    13

    Use a sharp razor blade to slice the adhesive bump off the windscreen, completing the repair.

Read More..

How to Replace the Rear Brake Pads on a 1995 Buick Regal

How to Replace the Rear Brake Pads on a 1995 Buick Regal

The 1995 Buick Regal was produced as a Custom Coupe and a Gran Sport sedan. It was equipped with the choice of a 3.1-liter V-6 or a 3.8-liter V-6. The 1995 Regal came standard with four wheel anti-lock disc brakes, including ventilated front discs. The rear disc brakes on the 1995 Regal have calipers, pads, and rotors similar to the front disc brakes.

Instructions

    1

    Remove the initial torque from the rear wheel lug nuts, using a tire iron. Do not remove the lug nuts completely, but turn them so they are unstuck (3/4 turn). Lift the rear of the Buick using a 2-ton jack or a jack with greater capacity. Set jack stands beneath the rear suspension arms or the rear axle beam, just inside the rear wheel assembly. Remove the lug nuts completely with a tire iron, then remove both rear wheels from the Regal.

    2

    Remove the rear caliper mounting bolts on one side of the Regal. Use a 3/8-inch ratchet to turn the caliper bolts counterclockwise until they are removed. Remove the caliper from the brake assembly, using a pry bar to gently pry the caliper off. Set the caliper on the suspension arm behind the brake assembly. Do not let the caliper hang freely or you can damage the fragile rubber brake hose.

    3

    Remove the old brake pads from the caliper mounting bracket, using a pry bar to gently pry the pads off if necessary. Lubricate the portion of the caliper mounting bracket that touches the brake pads. This is the part of the mounting bracket that the tips of the brake pads slide into. Proper lubrication is essential in reinstalling the brakes, to ensure optimal performance and function of the new pads. Use caliper grease that is rated for disc brakes.

    4

    Install the new brake pads onto the caliper mounting bracket. Two of the brake pads have wear indicators. These pads go on the inside of the caliper bracket, behind the rotor. Do not place both pads with wear indicators on one side of the Regal. The wear indicators are small metal tongues on the end of the pads that have a 90-degree bend in them, and are the reason for the "squealing" noise when pads get low. Install the wear indicator-equipped pad behind the rotor, and the non-wear indicator pad on the front or outside of the caliper bracket.

    5

    Lubricate the backing plates or shim plates on the back side of both of the newly installed brake pads. Failure to lubricate the back of the pads can cause squeaking in the new brakes within a couple hours of installation and driving. Dab caliper grease on the back side of the pads to create a thin film on the pads.

    6

    Install a 6-inch extension onto a 3/8-inch drive ratchet. On the opposite end of the extension install a caliper brake tool. The caliper brake tool is a 6-sided cube that has different adapter teeth on each side for use on multiple different vehicles. The rear calipers of the Regal have oscillating or rotating pistons. As the piston expands when you hit the brake pedal, it also rotates in a screw-like motion. The brake tool is essential in working on the rear brakes of many vehicles, as there are many vehicles with rotating rear caliper pistons.

    7

    Insert the caliper tool onto the piston of the rear brake caliper. Hold the caliper in one hand, while holding the ratchet, extension, and tool in your other hand. Turn the ratchet clockwise while simultaneously applying pressure to the piston on the rear caliper. This turning and pushing movement will compress the rear caliper piston. Compress the piston until it is nearly flush with the inside back wall of the caliper. The piston does not compress completely flush.

    8

    Install the compressed rear rotor back onto the Regal with one hand. Start the caliper mounting bolts through the caliper and into the mounting bracket, by hand. Turn the bolts clockwise to start them until the caliper can stand freely without you holding it. Tighten the caliper bolts to between 60 and 80 foot-pounds of torque. You can approximate this without using a torque wrench by snugging the bolts with a 3/8-inch drive ratchet and socket, then turn the ratchet 1/2-turn farther once the bolts are snug -- but using a torque wrench is best.

    9

    Repeat Steps 2 through 8 to complete the second side of the rear pads on the Regal. Performing this project on one side of the vehicle at a time will provide a visual reference for how the brakes look when they are assembled. This is useful if you have any questions about how the brakes go back together.

    10

    Install the rear wheels on the Regal after you have installed and torqued both rear brake calipers on the vehicle. Snug the lug nuts onto the wheel studs, using a tire iron. Lift the rear of the Regal off of the jack stands, and remove the jack stands from beneath the Regal. Lower the vehicle and tighten the lug nuts between 90 and 110 foot-pounds of torque. Use a certified torque wrench and lug nut socket to properly torque the wheel nuts.

Read More..

How to Repair a Stuck Rear Drivers Side Window

How to Repair a Stuck Rear Drivers Side Window

The rear drivers side windows on your vehicle may occasionally become stuck in either the closed or open position. The usual causes of this malfunction include the untimely failure of the window regulator or window motor. The window can also fall off or become stuck on its track if the glue holding the window to the track fails or if the track is obstructed by debris. Diagnosing and repairing this problem necessitates the removal of the interior door panel and trim.

Instructions

    1

    Turn the ignition key to the "On" position and attempt to operate the rear drivers side power windows. If you can hear the motor operating but the window wont move up or down, the window may be stuck on its track. If you cant hear the motor operating, the motor may need replacement. Check the fuses for the power windows before attempting to remove the window motor.

    2

    Disconnect the negative terminal cable from the battery with a wrench. This will decrease the likelihood of shock and prevent the battery from being drained.

    3

    Open the rear drivers side door. Remove the interior door panel and trim. The method for removing the panel and trim will vary depending on the vehicle. Consult your vehicles service manual and be sure to keep track of all clips and screws.

    4

    Inspect the windows track for signs of obstruction. You may need to apply a liberal amount of lithium grease to the track. If the window is off-track, clean the window of all adhesive and apply urethane-based glue to the windows mounting point. Reattach the window to the mounting point and leave the window undisturbed in the up position for one to two days.

    5

    Inspect the window regulator and motor. The window regulator will need to be replaced if the cables are snapped or frayed. If the window motor does not work, it will also need to be removed. Methods for removing both components may vary depending on the vehicle.

    6

    Reattach the door panel and trim to the rear drivers side door when finished. Close the door and reattach the negative terminal cable to the battery.

Read More..
Diberdayakan oleh Blogger.